Are you dreaming of transforming your backyard into a stunning outdoor retreat? Have you been eyeing those gorgeous travertine tiles at your local supplier but feeling overwhelmed by the installation process? You’re definitely not alone in this.
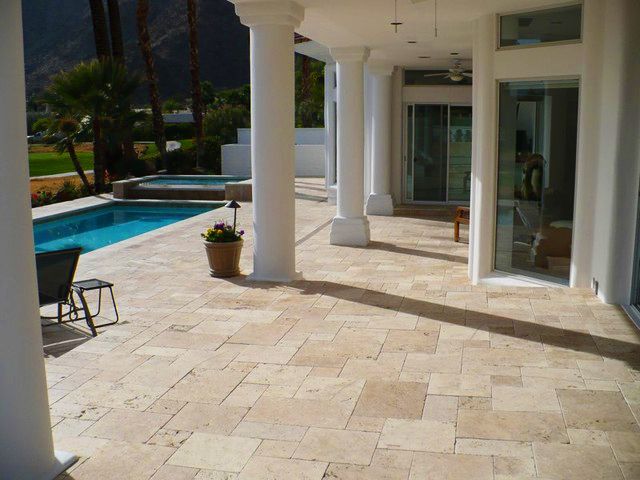
Travertine has become incredibly popular across Australian homes, and it’s easy to see why. This natural stone brings a timeless elegance to patios, pool surrounds, and outdoor entertaining areas. Its earthy tones complement our sunny climate beautifully, while the material stays surprisingly cool underfoot—even during those scorching summer days.
In this guide, we’ll walk you through five practical tips for installing outdoor travertine tiles like a pro. Whether you’re a confident DIYer or simply want to understand the process before hiring a tradesperson, you’ll find everything you need here. From preparing your surface to sealing and maintaining your finished project, we’ve got you covered. Let’s get stuck into it!
Preparing Your Outdoor Surface for Travertine Installation
Before you lay a single tile, your surface preparation will make or break the entire project. This step might not be the most exciting part, but trust us—it’s absolutely critical.
Assessing Your Substrate: Concrete, Sand, or Existing Paving?
Your existing surface determines your installation approach. Concrete slabs offer the most stable base for travertine tiles, providing excellent support and minimal movement over time. If you’re working with a sand base, you’ll need to ensure it’s properly compacted and levelled. Existing paving can sometimes serve as a foundation, but only if it’s in good condition without significant cracks or movement.
How to Level Uneven Ground Before Laying Travertine Tiles
Uneven ground creates headaches down the track. Use a long spirit level to identify high and low spots across your surface. For concrete, you can apply self-levelling compound to fill depressions. Sand bases require careful raking and compacting with a plate compactor. Aim for a slight fall away from your house—about 1% gradient—to ensure proper water drainage.
Do You Need a Professional for Surface Preparation?
Here’s the honest truth: if your surface has major issues like cracking concrete or significant drainage problems, bringing in a professional makes sense. They have the tools and expertise to address structural concerns properly. For straightforward preparation on stable surfaces, most handy homeowners can manage this stage themselves.
Choosing the Right Travertine Tiles for Outdoor Use
Not all travertine is created equal. Selecting the right tiles for Australian outdoor conditions saves you money and frustration in the long run.
Understanding Travertine Grades: Premium vs. Commercial
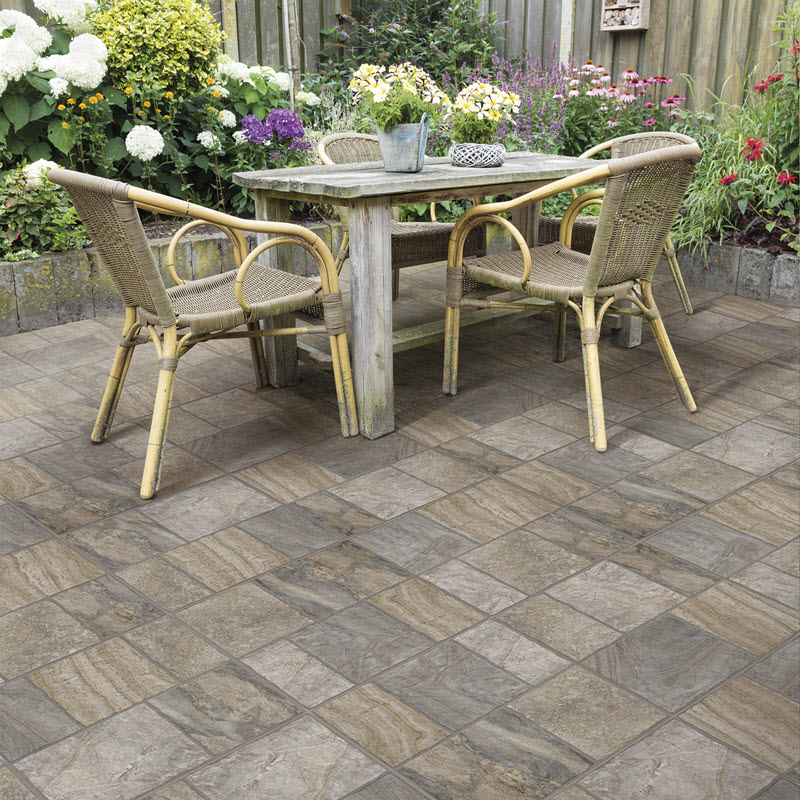
Premium grade travertine features fewer natural holes and more consistent colouring. Commercial grade has more variation and surface imperfections—which some people actually prefer for that rustic charm. For high-traffic areas like pool surrounds, premium grade offers better durability. Commercial grade works brilliantly for garden paths or less-used spaces where a natural, weathered look suits the setting.
What Thickness of Travertine is Best for Outdoor Paving?
Thickness matters significantly for outdoor applications. For standard patio use, 20mm tiles provide adequate strength when laid on a solid concrete base. If you’re installing on a sand or gravel base, opt for 30mm pavers instead. Pool coping often requires 30mm or thicker to handle the constant moisture exposure and foot traffic around the water’s edge.
Tumbled vs. Honed Finishes: Which is Better for Pool Surrounds and Patios?
Tumbled travertine has rounded edges and a textured surface that provides excellent grip when wet. This makes it ideal for pool surrounds and areas prone to splashing. Honed travertine offers a smoother, more refined appearance but can become slippery when wet. For poolside areas, tumbled finishes are the safer choice. Covered patios or entertainment spaces might suit the sleeker honed look perfectly.
Essential Tools and Materials You’ll Need
Having the right gear on hand prevents frustrating trips to the hardware store mid-project. Here’s what you’ll need to gather before starting.
A Complete Checklist for DIY Travertine Installation
Your essential toolkit includes:
– Rubber mallet for tapping tiles into place
– Spirit level and string line for alignment
– Tile spacers (typically 3-5mm for travertine)
– Notched trowel for spreading adhesive
– Grout float and sponge
– Tile cutter or wet saw for trimming
– Knee pads for comfort
– Safety glasses and gloves
You’ll also need outdoor tile adhesive, grout suitable for natural stone, and a quality penetrating sealer.
Can You Lay Travertine Tiles Without Professional Tools?
Absolutely, though some jobs become much easier with proper equipment. A wet saw produces cleaner cuts than manual tile cutters, particularly for thicker pavers. If you’re only making a few cuts, many hardware stores offer tool hire. A plate compactor is worth renting for sand base preparation. For small, straightforward projects, basic hand tools can get the job done well.
Step-by-Step Installation Techniques for Best Results
Now for the exciting part—actually laying your beautiful outdoor travertine tiles. Follow these steps for a professional-looking finish.
How to Lay Outdoor Travertine Tiles on Concrete
Start by dry-laying your tiles to plan your pattern and identify where cuts are needed. Apply outdoor tile adhesive to the concrete using your notched trowel, working in small sections. Press each tile firmly into place, using a slight twisting motion to ensure full contact. Check levels constantly as you progress.
Work from one corner outward, maintaining consistent spacing throughout. Keep a damp cloth handy to wipe any adhesive from tile surfaces immediately—it’s much harder to remove once dried.
The Importance of Proper Spacing and Alignment
Consistent spacing creates that polished, professional appearance. Use tile spacers between each tile to maintain uniform gaps. For a traditional look, 3mm spacing works well. Larger 5mm gaps suit rustic or tumbled travertine better.
Run string lines across your work area to keep rows straight. Check your alignment every few tiles—small errors compound quickly and become very noticeable in the finished project.
Grouting Travertine Tiles: Tips for a Clean, Professional Finish
Wait at least 24 hours after laying tiles before grouting. Use a grout specifically formulated for natural stone—standard cement grout can stain travertine. Work the grout into joints using your float, holding it at a 45-degree angle.
Clean excess grout from tile surfaces with a damp sponge before it hardens. Rinse your sponge frequently and avoid pressing too hard, which can pull grout from the joints. Allow grout to cure for the manufacturer’s recommended time before walking on your new surface.
How Long Does It Take to Install Travertine Pavers?
For an average-sized patio of around 20 square metres, expect to spend a full weekend on installation. Surface preparation takes several hours or potentially a full day if levelling is required. Laying tiles typically proceeds at 3-5 square metres per hour for a confident DIYer. Add another day for grouting and cleanup.
Sealing and Maintaining Your Outdoor Travertine
Proper sealing protects your investment and keeps your travertine looking stunning for years. This step is non-negotiable for outdoor installations.
Do Outdoor Travertine Tiles Need to Be Sealed?
Yes, outdoor travertine absolutely needs sealing. Unlike indoor tiles, outdoor travertine faces rain, pool water, sunscreen, food spills, and UV exposure. A quality penetrating sealer soaks into the stone, providing protection without changing its natural appearance. Without sealing, travertine absorbs stains quickly and can deteriorate faster in harsh weather conditions.
How Often Should You Reseal Travertine Pavers?
In Australian conditions, plan to reseal your outdoor travertine every two to three years. High-traffic areas or poolsides may need attention annually. You’ll know resealing is due when water stops beading on the surface and instead soaks in quickly. Before resealing, clean the surface thoroughly and allow it to dry completely.
Simple Maintenance Tips to Keep Your Travertine Looking New
Regular maintenance is straightforward. Sweep weekly to remove debris that could scratch the surface. Hose down monthly to wash away dirt buildup. For stubborn marks, use a pH-neutral stone cleaner—avoid acidic products like vinegar, which damage travertine. Address spills promptly, particularly oily substances or coloured liquids.
Common Installation Mistakes to Avoid
Learning from others’ errors saves you time, money, and frustration. Keep these common pitfalls in mind.
Why Proper Drainage Matters for Outdoor Travertine
Poor drainage causes water pooling, which leads to algae growth, staining, and potential freeze-thaw damage in cooler regions. Ensure your surface slopes away from structures at approximately 1% gradient. Install drainage channels if needed, particularly around pools where large water volumes are common.
Is Travertine Slippery When Wet?
Tumbled and brushed travertine finishes provide good traction when wet. Honed or polished finishes can become slippery and aren’t recommended for pool surrounds or areas frequently exposed to water. Choosing the appropriate finish for your specific application eliminates this concern entirely.
Final Thoughts on Installing Outdoor Travertine with Confidence
Installing outdoor travertine tiles transforms your space into something truly special. With proper preparation, the right materials, and careful attention to technique, you can achieve professional results that last for decades.
Remember the key points: prepare your surface thoroughly, choose tiles appropriate for your application, gather all necessary tools before starting, follow proper installation techniques, and never skip the sealing step. Avoiding common drainage and slip-resistance mistakes ensures your project succeeds beautifully.
Whether you tackle this project yourself or hire a professional, you now have the knowledge to make informed decisions every step of the way. Your stunning new travertine patio or pool surround awaits—so get planning and enjoy the transformation!