I mentioned a couple of posts ago that I was working on a couple of DIYs. It was just my puppy and me a few days this week, so I crafted away. By the way, I find crafting is always better with wine! This particular DIY does take some serious concentration; it took me a bit longer than I thought. But I am so proud of the final product. What’s so great about this DIY is everyone can be a little bit different! It is also a bit sentimental to me – the burlap and the “M” were used at our wedding, and now I can see them every day!
Things You Will Need:
- Burlap ribbon (pictured below)
- Chevron wired burlap ribbon (pictured below)
- hot glue gun
- wreath base (pictured below)
- initial (optional; you can use flowers, little pumpkins, or leave it plain!)
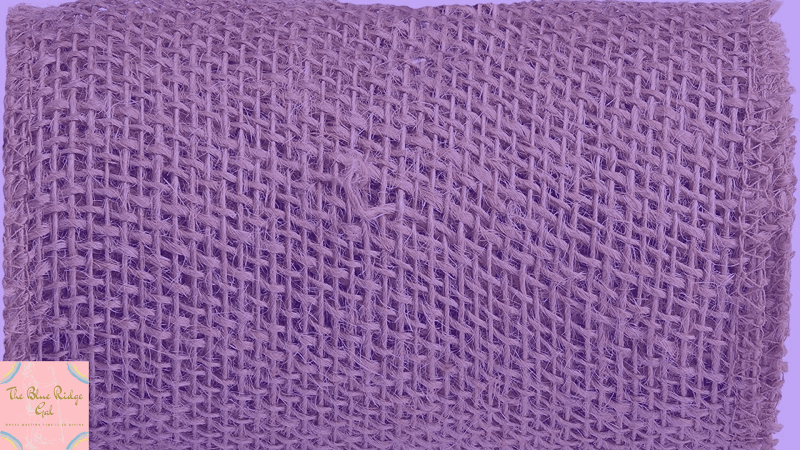
Burlap ribbon from Hobby Lobby.
Chevron ribbon from Hobby Lobby. I used white, but you can use any colors.
How to Make a Burlap Wreath?
This is what I used for my wreath base, based on research I did on Pinterest. After actually having made one, I don’t think this particular base is absolutely necessary. You could use floral foam, styrofoam, or anything else around and big enough to glue to. Your size will depend on how big you want it.

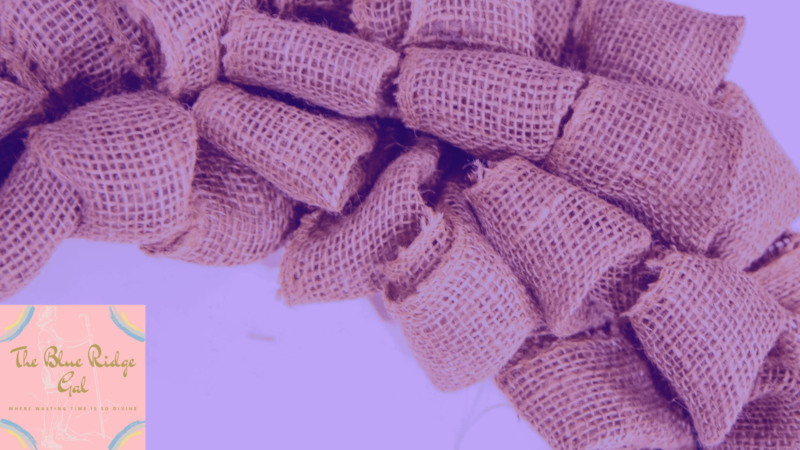
I started by weaving the burlap over, under, over, under these wires on the base. It looks a bit like this. Keep in mind there is no right or wrong way to do this! If you use a foam base, you will just create each ruffle and glue it right to the foam. (Don’t use a huge amount of glue or you will melt too much of the foam away.)
After you weave a row, then bunch it up to make it look ruffles (is that even a word?!). On the tutorials I read, others did not glue their ruffles into place. But in my experience, there is no way mine would have stayed the way I wanted so I used hot glue to secure it. My pattern was weave, scrunch, glue, let dry. Weave, scrunch, glue, let dry. Over and over and over. The glue gun was so helpful because if one loop was too big or too sideways, I just glued it in a position that I did like it in. Here are some pictures of it along the way.
After all the wire was covered, I tied a bow out of the chevron ribbon to glue to the top of the wreath. I glued it to (in my opinion) the worst looking part to hide it! I then used more of the chevron ribbon to secure the “M”. I doubled it up, glued it to the back of the M, and then glued it to the underside of the wreath.
The “M” swung forward a bit, because of the natural shape of the letter. So I took a small piece of floral wire and glued it on the backside of the “M” and across the back of the chevron ribbon to keep it from falling over. You can see this in the first picture that I posted. I was so excited to try it out on our front door!
Overall I am so pleased with how this turned out. I may even make a second one that is more of a Christmas theme!
VIDEO INSTRUCTIONS: DIY BURLAP WREATH
Video Credit: A Happy Girl’s Home – Youtube